Top
iPhone Case
12-28-14
Introduction
I got an iPhone 6 Plus recently. As always it needed a case. There are many cases on the
market ranging from the cosmetic to the waterproof. The cosmetic cases are easily found in
retail stores. The cases that are waterproof and shock proof are difficult to find locally.
There are a lot of cases online that are made of Titanium or are branded "Titanium". Without
elaborating I will just say that I totally don't understand the design purpose of some of
what I see. Also while I could order them online I like to handle them first before making
the purchase.
What better excuse besides wanting to build one is needed?
The following shows my somewhat experimental build of a custom iPhone case.
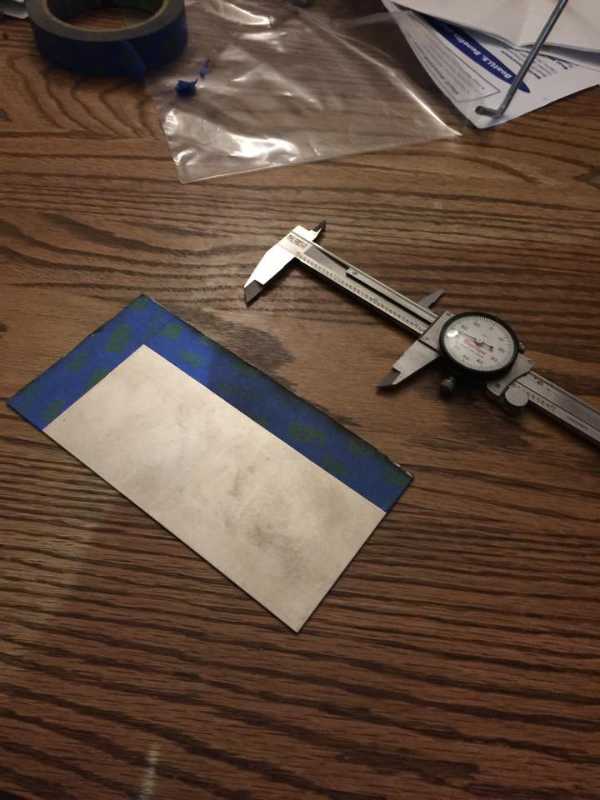
The first step was to cut a piece of titanium 6 3/8 x 3 1/4 inches. I used a Dremel tool
with a disk grinder to make the cuts. It was slow but effective. I went through three disks
doing these cuts. Next I filed it down smooth and to the measurements I needed.
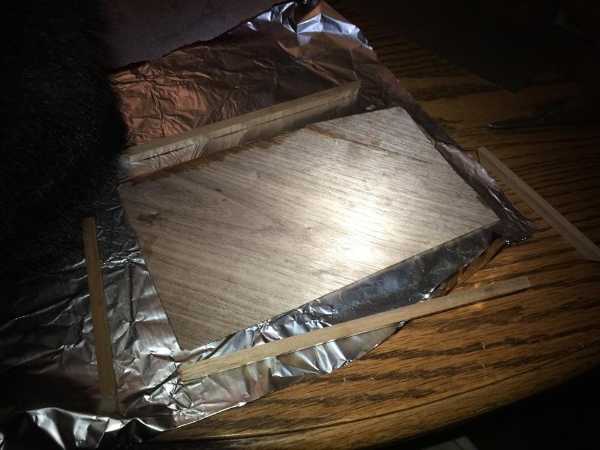
Next, as titanium is rather stark looking, I laminated walnut veneer. To get more strength
in the edges I set up two layers with grain at 45 degree angles. I set up the finish layer with
grain parallel to the longer dimension of the titanium. I used West Epoxy on the three veneer
layers and let it cure for a day.
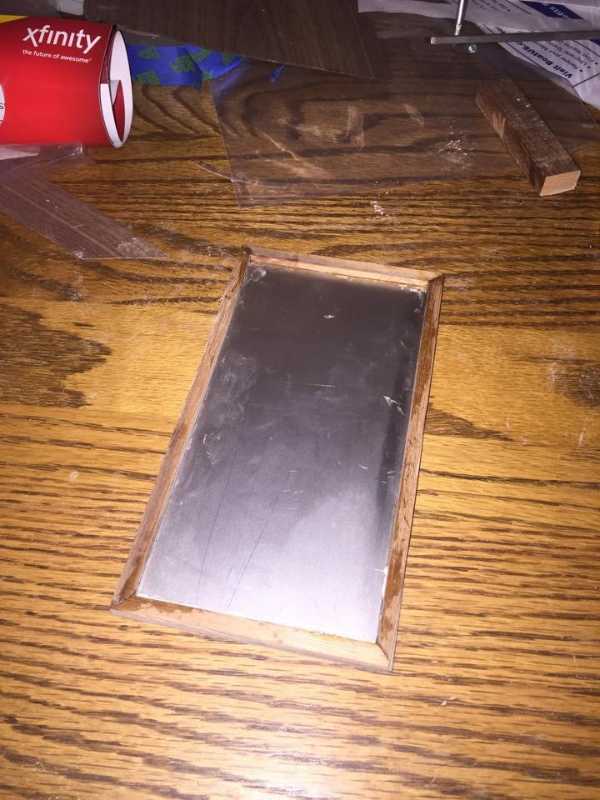
Next I cut walnut 1/4" square section to make the edges. I sized the opening carefully to
accomodate the titanium sheet in a snug fit but I did not install the titanium yet. After the
rectangle cured I cut away the excess veneer. Finally I glued in the titanium with just enough
3M 5200 to coat the back of the titanium. I weighed it down with enough force to hold it tightly
against the veneer until it cured. There was just a small amount of squeeze out which I trimmed
away.
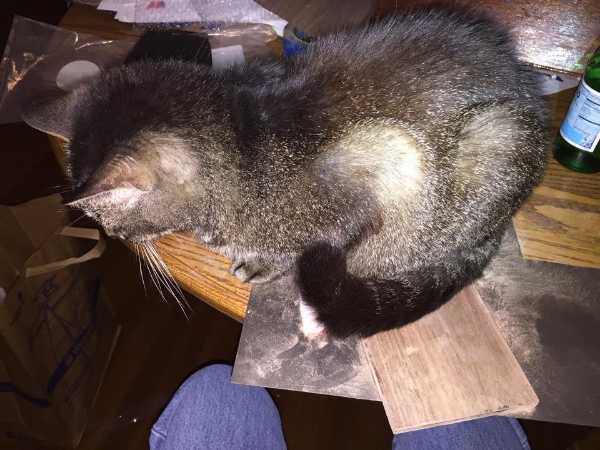
Tansy is helping out with the build.
Next I make the back. As this doesn't require as much knock resistance I used a sheet of 1/8"
sapele. I used the completed front to trace the outline for the back. As with the front I used
1/4 walnut square section.
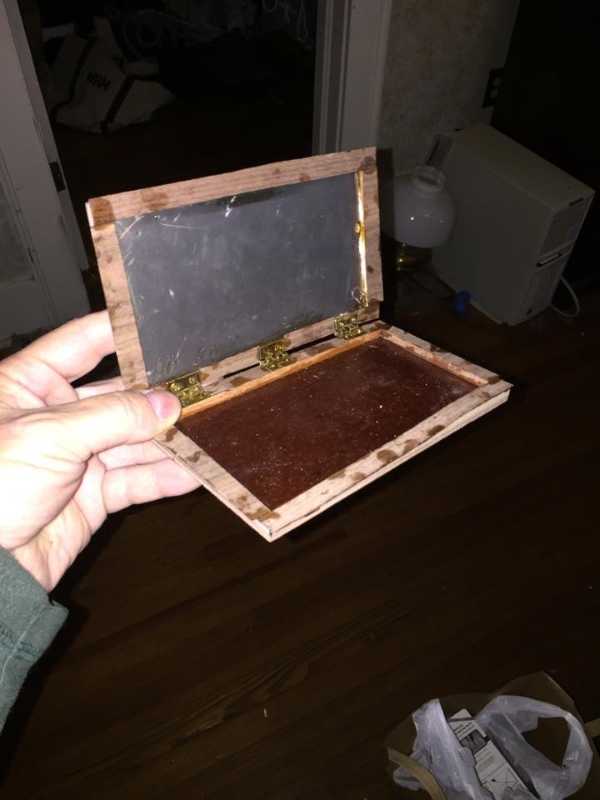
Here is the nearly complete case. I mounted three small hinges. I very carefully sized the depth and diameter of the
holes for the hinge screws. Instead of cutting slots to recess the hinges I built the border up with more walnut veneer.
The veneer was almost as thick as the hinges so it worked out well.
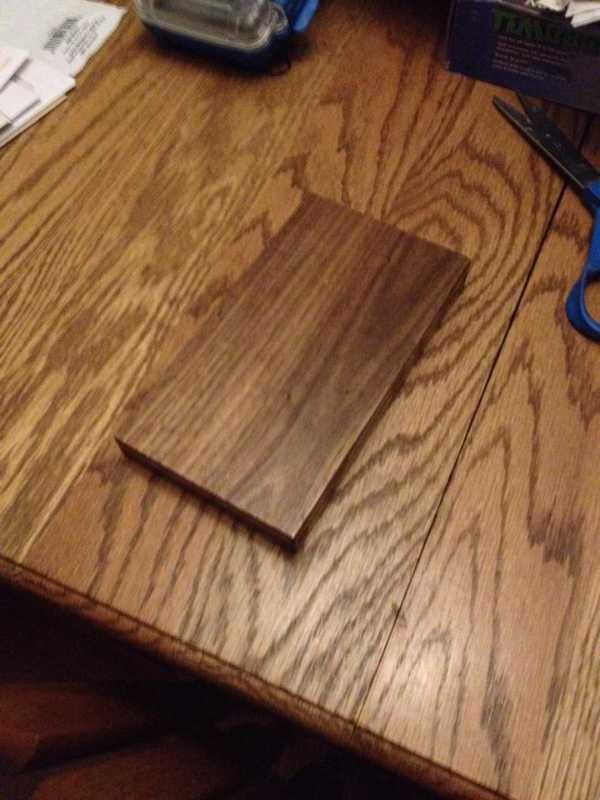
Here is the finished case. I sanded the corners slightly round and applied
three coats of thinned Epifanes varnish.
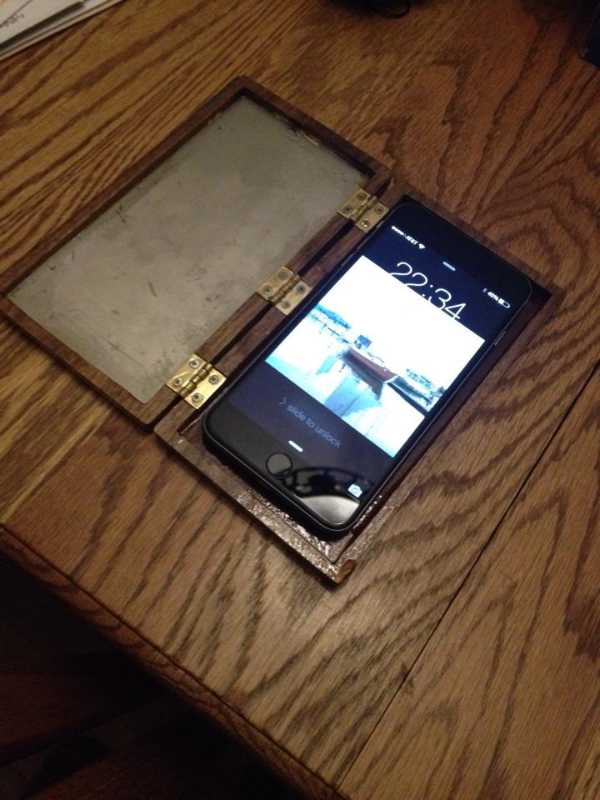
I mounted the iPhone with small squares of sticky velcro. Unlike with the iPhone
4s the velcro sticks tenaciously to the back of the phone.
Using
This box is only slightly larger than my circa 1996 Rhino Skin Titanium box. After
using it for a few weeks it works out well. But the most glaring deficiency is the
lack of a camera hole. I looked at putting one in but the backwash of light from the
edges of the hole will fog the picture up. I may go ahead and do it though and paint
the edges of the hole black. Alternatively I may make the back hinged down so it will
not have that problem at all. There is plenty of room inside for the iPhone so I can
try out some ideas.
The three hinges have held up so far without any sign of coming loose.
I'm completely happy with the way the front turned out so I won't change it any.